Every project has its ebbs and flows. Phius projects by their very nature are more complex than a conventional home. Energy modeling, air sealing details, window orientations and shading, and sizing the HVAC systems for comfort all present challenges above and beyond a conventional home. It’s as much an exercise in coordination as it is on build quality.
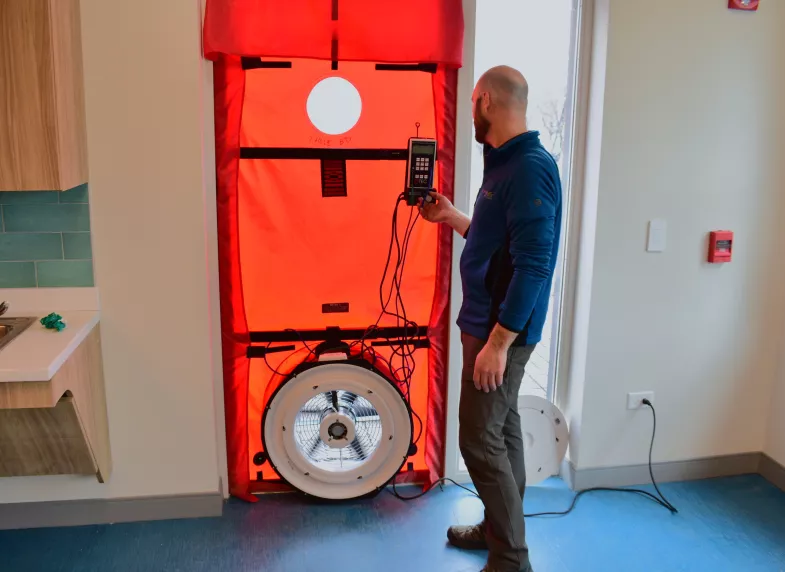
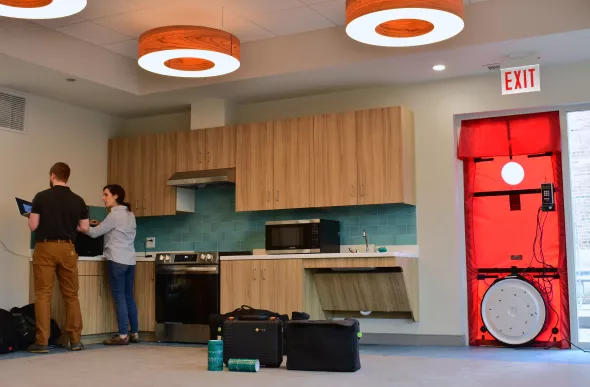
One aspect that seems to get the most attention is the blower door test. This always seems to be the most dramatic (and stress-inducing) of all the tests and verification work that goes into Phius Certification. In this blog, I hope to provide some guidance on conducting blower door tests that remove some of the anxiety from the process.
Test Early and Test Often
Whether a single-family home or a multifamily building, mid-point testing is an extremely valuable tool in determining the level and quality of air sealing. Single-family homes are relatively easy. Multifamily buildings not so much. Larger projects can have a more complex test setup and require more building preparation and management of personnel working in and around the site. Regardless of typology, conducting a mid-point blower door test to validate the air sealing work is highly recommended, and under the Phius CORE Prescriptive Path it is required.
For a single-family project, you don’t want to just show up for a mid-point or final test without taking measures to ensure the building is in the proper condition. For mid-point tests this can be a challenge. First, determine the target leakage rate for the project. This requires looking at the overall envelope surface area used for modeling. When conducting a HERS Rating in parallel with the WUFI or prescriptive modeling, ensure the surface areas are in agreement. The test report and QA workbook should match.
Next, determine the target leakage rate in CFM50/SF. This is the metric used by Phius in lieu of ACH50. Use the target (0.06 CFM/SF) as an example in your testing software. It’s also helpful to know if a lower air tightness value was used in the modeling. Sometimes a value lower than the standard Phius targets of 0.08 CFM50/SF for 5+ stories non-combustible construction or 0.06 CFM50/SF are used in the modeling to ensure annual, peak and source energy targets are met. Find this out from the Phius Certified Consultant (CPHC®) well in advance of any testing.
Equally important for all Phius projects is an inventory of items that need to be prepared for the test in advance. For a mid-point test, knowing the status of window and door installations is crucial. They are part of the envelope, and if any are missing or not installed the results may or may not be comparable to your final test. The more building elements not installed, the more the test is used to validate opaque portions of the building only. The more “real” the test setup, the more your results will have relevance to the final test.
A good example – other than windows and doors – are mechanical and electrical penetrations. A detailed inventory of each building penetration is very helpful to determine the disposition of them for the test. Ventilation ducts, line sets, cold and waste water piping, electrical service, and radon stacks can all contribute to air infiltration if not addressed for the test. Use this inventory to check and verify the items are installed prior to testing. Equally important is the disposition of the openings. Duct penetrations for ventilation systems, dryer vents and exhaust devices are examples of items that may or may not be taped off for the test. The answer lies in the test standards themselves. RESNET 380, ASTM 3158, ABAA and the Phius Guidebook are all consistent with respect to how to treat openings in the building, and this should be known well in advance of the test.
Testing Large Multifamily Projects
For larger multifamily projects, the inventory is more complex, and a formal testing plan is essential. You likely will have Americans with Disabilities Act (ADA) compliant doors, rooftop equipment, elevator shafts, trash chutes and any number of other penetrations or openings into the building envelope.
Use the construction documents to identify the openings and whether or not dampers are provided. If dampers are specified, what type? Gravity/spring loaded or motorized? Are these dampers tied to systems that operate continuously (more than 8,000 hrs/yr)?
Inventory any roof top mounted equipment and have an understanding how those systems draw air into/out of the building. Check adjacent utility spaces to see if they are in or out of the envelope to be tested. A good testing plan will include an inventory of all doors, operable windows and penetrations and mechanical equipment mentioned above.
Determine the location of your blower door or doors for the test. Can you test the building with a single fan, or are multiple fans required? Mark locations for the test equipment and ensure the openings are sized to accommodate the frames. Be sure to answer the following questions:
If using multiple fans, where will they be located?
How will the pressure monitoring devices communicate with one another and your test software?
Are there interference and communication challenges that require hardwiring the test devices?
Will additional manometers need to be used to ensure all zones within the building see the same test pressure?
Interior doors need to be opened. In the case of dwelling units, are door closers installed?
Are there any portions of the building that do not directly communicate with the blower door location?
Have a Strong Testing Plan
Don’t leave the above to chance. A good testing plan will have all of this determined early in the project. The plan can then be reviewed with the owner and builder/GC. Conversations as to who will prep the building and the test schedule needs to take place. It may take several days to prep the building, especially for a final test. Leave yourself enough time to review the plan with the owner or builder and walk the building prior to testing. Conduct an inspection to ensure the setup is complete and robust enough to withstand the testing. Build in time for inevitable unforeseen issues that will arise, such as weather.
Many projects will not pass a final blower test on the first attempt. Have contingencies in place as to what to do in the event it doesn’t pass.
I hope the above gets folks thinking about advanced planning and developing a testing plan as early as possible. The larger, more complex the project, the more detailed the plan needs to be. A good plan will help you stay on top of things as the test unfolds. There are lots of folks out there doing the same work and experiencing the same successes and challenges as you so don’t be PHearful of blower door testing.